How to fit MIG Torch Teflon Liners for Aluminium wire
A step-by-step guide on how to fit Teflon & Poly style Liners to MIG Welding Torches, for use with aluminium MIG wire.
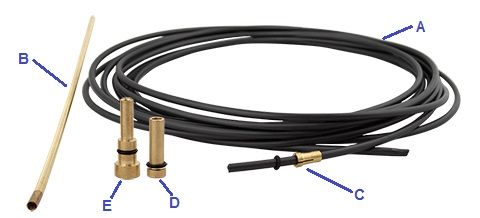
Liner Kit Contents:
The following contents are included in Weldclass "Universal Series" Liners. Other liners may include only some of these parts.
A. Poly or Teflon Liner
B. Neck Liner (Note that Weldclass P3-CTUL12 & P3-CTL12/11 liner kits contain 2 neck liners - see comments below)
C. Collet and O-ring - for Euro connect torches
D. End Fitting for Tweco Style Torches
E. End Fitting for Bernard Style Torches
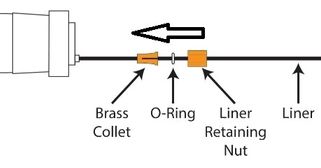
Typical Assembly Diagram:
Weldclass P3-CTUL12 & P3-CTL12/11 Liner Kits (for 1.2/1.6mm wire):
These liner kits contain 2 neck liners.
(Note that to accomodate larger wires, the poly liner material has the largest ID/OD possible - which then creates tighter tolerance for the size of the neck liner that can be used)
Brass Neck Liner: This liner has a smaller O.D. to allow it to fit Binzel style torches. Binzel style torches have smaller internal dimensions, which limits the O.D. size of the neck liner that can be used.
The end of the poly liner will need to be carefully trimmed/shaved to allow this neck liner to fit.
Copper Neck Liner: This liner has a slightly larger O.D. and minimal (if any) shaving of the poly liner is required to fit it. Please note this neck liner will NOT fit Binzel style MIG torches. It will fit most other torches such as Tweco, Bernard, etc.
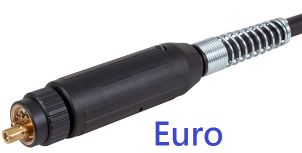
Fitting Instructions for Torches with Euro Connection:
1. You will need: liner with brass collet fitting (A) & the neck liner (B).
2. Screw the neck liner (B) onto one end of the liner. Note: If the brass neck liner is difficult to screw onto the liner, it may be necessary to carefully trim/shave the liner with a sharp knife first.
3. Lie the MIG torch cable out flat & straight, remove the liner retaining nut & remove existing liner
4. Remove all parts on the neck of the torch (tip, nozzle, tip holder, gas diffuser, etc)
5. Starting at the connection end of the torch, gently push the teflon liner (starting with the neck liner first) into the torch until the liner protrudes from the torch neck.
6. Pull the liner back just far enough to allow tip holder to be replaced. Replace the tip holder, tip, gas diffuser, nozzle, etc
7. From the connection end, carefully push the liner to make it seat against the back of the tip holder. Do NOT cut the liner. Slide the Brass Collet then the O-ring over the liner until the brass collet locates into the euro connector. Make sure that the liner is still pushed firmly into the torch, replace the liner retaining nut & tighten gently (do not over tighten).
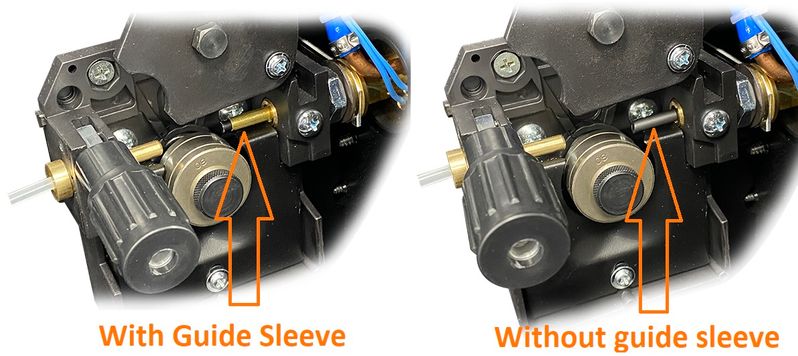
8. If your welding machine has not already been set up with a Teflon/Poly liner, the Euro connection on the machine or wire feeder will most likely have a steel or brass guide tube inserted in the centre. You will need to remove this tube (with long-nosed pliers), so that the Teflon/Poly liner can continue through the euro connector to the drive rollers. See diagram above.
Note: Some machines or liner kits may be supplied with a thin-walled metal guide sleeve. This can be used to replace the brass guide tube, to support the telfon/poly liner. It may need to be cut to length. This sleeve can be important if there is an abnormally long "gap" between the torch connection and drive rollers. Otherwise, this tube is not essential, so don't worry if you don't have one.
9. Lift the drive roller tension arm to allow excess liner to pass through into the wire feeder. Feed liner protruding from torch into the euro connector / guide sleeve on the machine until the torch can be connected. Connect & tighten torch.
10. Usually the liner should be cut so it is as close to the drive rollers as possible, so the wire is supported and there is minimal "gap" that may cause the wire to kink when there is friction "upstream". (The best tool to cut the liner is a sharp razor knife).
The torch is now ready to use!
Note: If you are using aluminium wire, you must have the correct “U-groove” drive rollers & aluminium “clearance” contact tips. More about this topic here.
Fitting Instructions for Torches with Non-Euro Connection
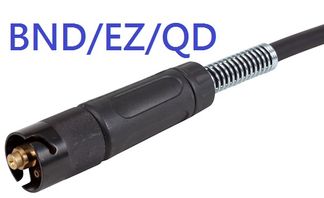
includes Tweco 'Bayonet' or Bernard 'QD'/'EZ' style connections.
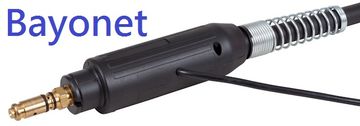
1. You will need: liner (A) with brass collet fitting (A) & the correct brass end fitting to suit your torch (D/E)
2. Screw the neck liner (B) onto one end of the liner. Note: If the neck liner is difficult to screw onto the liner, it may be necessary to carefully trim/shave the liner with a sharp knife first.
3. Lie the MIG torch cable out flat & straight & remove existing liner
4. Remove the liner retaining nut at the connection end of the torch
5. Remove all parts on the neck of the torch (tip, nozzle, tip holder, gas diffuser, etc)
6. Starting at the connection end of the torch, gently push the liner (A) - starting with the neck liner first - into the torch until the neck liner protrudes from the torch neck.
7. Pull the liner back just far enough to allow tip holder to be replaced. Replace the tip holder, tip, gas diffuser, nozzle, etc
8. At the connection end, put a mark on the liner flush with the connection of the torch
9. Pull the liner back a short distance, then cut the liner. The best tool to cut the liner is a razor sharp knife to avoid distorting the shape of the liner.
10 . Choose the correct Brass End Fitting (D/E) to suit your torch & screw brass end on the liner (brass end has an internal thread & should self-screw onto the liner). Note: If the brass end fitting is difficult to screw onto the liner, it may be necessary to carefully trim the liner with a sharp knife first.
11. Push the liner back into the torch until the brass end seats inside the end of the torch connection.
12. The torch can now be connected to the machine and is ready to use.
Note: If you are using aluminium wire, you must have the correct “U-groove” drive rollers & aluminium “clearance” contact tips. More about this topic here.
More Information on Torch & MIG Welder Set Up for Aluminium
Related Products & Articles
MIG Welding Torches & Spares
All MIG Welding Articles
MIG Wire Feed Troubleshooting Guide
How to set up your MIG welder for Aluminium welding
How & why guide to Pulse MIG welding
-
Thanks for sharing information. is very helpful and informative.Date: 01-09-2021TSCA Electrical Supply https://tsca.com.ph

